|
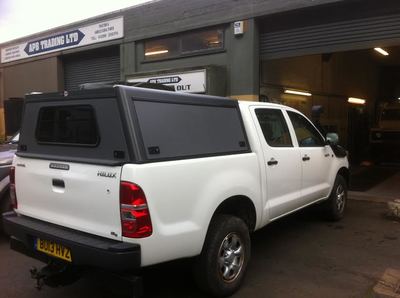
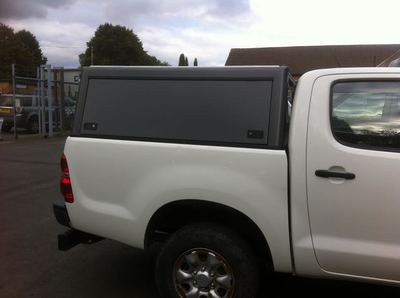
Why a special alloy canopy? The GRP canopies that are sometimes delivered with the new vehicle or fitted from the wide range of available manufactures might be OK for light loads on urban roads, but not for mile after mile of car breaking roads in remote places, loaded with roof tents and who knows what else. We wanted to finish this trip with the things we started with, so tough was the overall requirement, and we didn’t think the GRP or roto-moulded plastic ones even with an internal frame were going to last, so we wanted a suitable alloy canopy that was welded together. We could have bought a vehicle with or without a canopy but to be honest, it was a little easier to get one without. The decision to get this brand of canopy was pretty easy for us. We only saw 2 brands. The other one was a custom build. This was a time critical build for us - we had expected to buy everything we needed off the shelf and were a bit surprised at the lack of choice in the UK, but when we had a good look at the Bushtech we felt more relaxed as it had all the features we were looking for. We wanted the following from the canopy
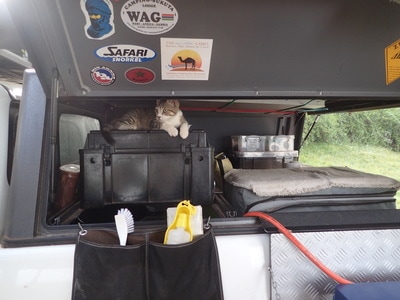
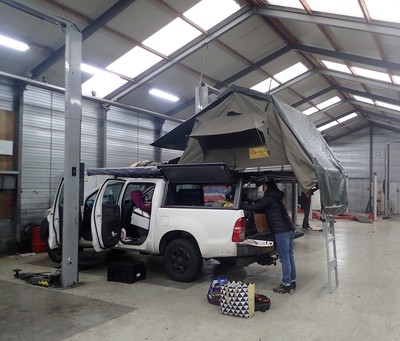
By far the best feature for us is the 3 opening doors that allow us to access every inch of the back of the vehicle. They each have 2 gas struts so they swing open nicely when the latches are released and every latch can be locked for good security. We cook from the left side, the fridge and prep areas are at the rear, and the right side is the workshop and storage area. With all the doors open we can be camp ready in seconds and packing up is equally as fast. We bought a few custom extras to fit it. A rack that fits the ‘wolf box’ type storage boxes fits up against the headboard end, holding 3 boxes with secure screw down fasteners, and a removable stove table that folds up for easy storage. We also opted for the dust kit. I am not sure why this is an option and at £75 should really be a standard feature absorbed into the total price. I couldn’t imagine not having the dust kit. It would be a nightmare of dust and dirt every day to deal with otherwise and it works perfectly. I installed LED lighting on the left and rear doors. We had always planned on having a drawer system for storage but we didn’t for a number of reasons. Number one was the £1500 price tag for the basic 2 drawer system, number 2 was the dead space we would have created around the edges and back, and number 3 was the un-necessary weight of the system. Instead, we have 9 plastic boxes! Sounds a bit like we will be replacing boxes all the way to New Zealand? We hope not and so far, they have worked out exceptionally well mainly due to the ability to access them via the canopy doors. It’s a very simply and evolving system that works a bit like this: We have 4 main 30 litre boxes stacked 2 high next to the fridge and accessed from the rear. 2 have cooking, eating and prep items and 2 have some bulk and everyday food items. We can access most of the bottom boxes without removing the top box and they easily slide in and out if we want them to. On top of one stack is a smaller 18 litre box called ‘Dave’s coffee stuff’ (which is full of my coffee things) and on the other stack 2 smaller 5 litre ones that have cutlery and tea towels, paper towels n’ stuff. These are all secured with a strap to stop bouncing and sliding. Right at the headboard we have a 75 litre box with our bulk items and another 30 litre box with bedding, towels and washing items. Above them is the rack with the wolf boxes. The 75 litre box is a little hard to get at, but if I move a few things around I can be in it within 30 seconds of stopping. We have a space in between the big box and the 4 smaller boxes that holds the gas bottles, BBQ, the awning shade and insect room. When it’s packed ready for the road, nothing moves or slides. The boxes are exactly the right size, but not by accident. As soon as we bought the vehicle, we measured the width and depth of the tray and spent hours and hours on the internet looking for good quality, tough boxes to fit. We found the brand ‘Really Useful Boxes’ at B&Q hardware UK, and so far, they have been an excellent choice. We have water containers and the stove in the wheel well area to fill out the dead space, but it’s the all-round access provided by the canopy that makes it all work so well. The canopy has 2 rails welded into the top and the roof inside. This allow for various fittings to be secured inside and out. On the roof, we have 3 x Rhino bars that hold our 1.6m wide tent and in front of them I have 2 sand ladders secured on the same rails. Inside on the roof, we have the table that is simply held up with bungee cords. Another factory accessory is available for the table but the solution we have is working pretty well for now and it’s a lighter and cheaper solution. The options for fitting different racks and tents are endless on these welded rail systems and we have room for expanding our options as we travel. What we don’t like? It’s just the locks. When we were in the Arctic Circle they froze as rain water can run into the key slot and build up, and now we are in Africa we are having problems with the dust getting in them. Sometimes it can take me several minutes to get the key in and turned and with 6 locks it can be a pain. I have been told they are the premium quality fitting by another overland vehicle builder but the key hole needs a redesign to include a rubber dust cap. It may be that the lock should not be mounted facing up for this reason? I have a compressor and lightly dust them out when I remember. Otherwise it’s just fine. For us, the canopy is the real gem of this overland vehicle and we have often commented on how well it works and how good it looks. We saw a vehicle with a GRP canopy not long ago and we both agreed we made the right choice on getting a custom-built canopy. Right now, it’s our kitchen, workshop, storage unit and bar and it does all those jobs well! It’s also become the home for our travelling cat, Luxy. She spends our camping days on the wolf boxes or the fridge snoozing in the shade or out of the rain. |
Just our thoughts...We completed the build of our overland vehicle in just 10 days! That's from taking delivery of the car to heading off on Our Epic Trip. ArchivesCategories
All
|
Proudly powered by Weebly


 RSS Feed